In this little tutorial, I demonstrate how to use mitmproxy and elinks to exploit a vulnerable web app completely from the command line. The target used is DVWA (Damn Vulnerable Web Application), which is running locally in a docker container.
The Tools
Elinks is a console-based web browser that can be used to browse through websites from the command line. From the manual;
ELinks is a text mode WWW browser, supporting colors, table rendering, background downloading, menu driven configuration interface, tabbed browsing and slim code. Frames are supported. You can have different file formats associated with external viewers. mailto: and telnet: are supported via external clients. ELinks can handle both local files and remote URLs. The main supported remote URL protocols are HTTP, HTTPS (with SSL support compiled in) and FTP. Additional protocol support exists for BitTorrent finger, Gopher, SMB and NNTP. The homepage of ELinks can be found at http://elinks.cz/, where the ELinks manual is also hosted.
MITM Proxy is a proxy that you can use from the terminal to inspect, modify, and replay HTTP traffic. Think of it as a console-based Burp Suite alternative. From the official site;
mitmproxy is your swiss-army knife for debugging, testing, privacy measurements, and penetration testing. It can be used to intercept, inspect, modify and replay web traffic such as HTTP/1, HTTP/2, WebSockets, or any other SSL/TLS-protected protocols. You can prettify and decode a variety of message types ranging from HTML to Protobuf, intercept specific messages on-the-fly, modify them before they reach their destination, and replay them to a client or server later on.
In this post, I will be using the two tools mentioned to solve a challenge in DVWA.
Setup
Now that we know the tools we need, let’s get started. You can install ELinks and MITM proxy in debian-based distros (which is what I’m using) with;
1
$ sudo apt install elinks mimtproxy

I already have DVWA installed locally in my docker container, and there is a good tutorial here on how to set it up.
With DVWA installed, it’s time to test the tools. You can open a URL in elinks using the command;
1
$ elinks <url>
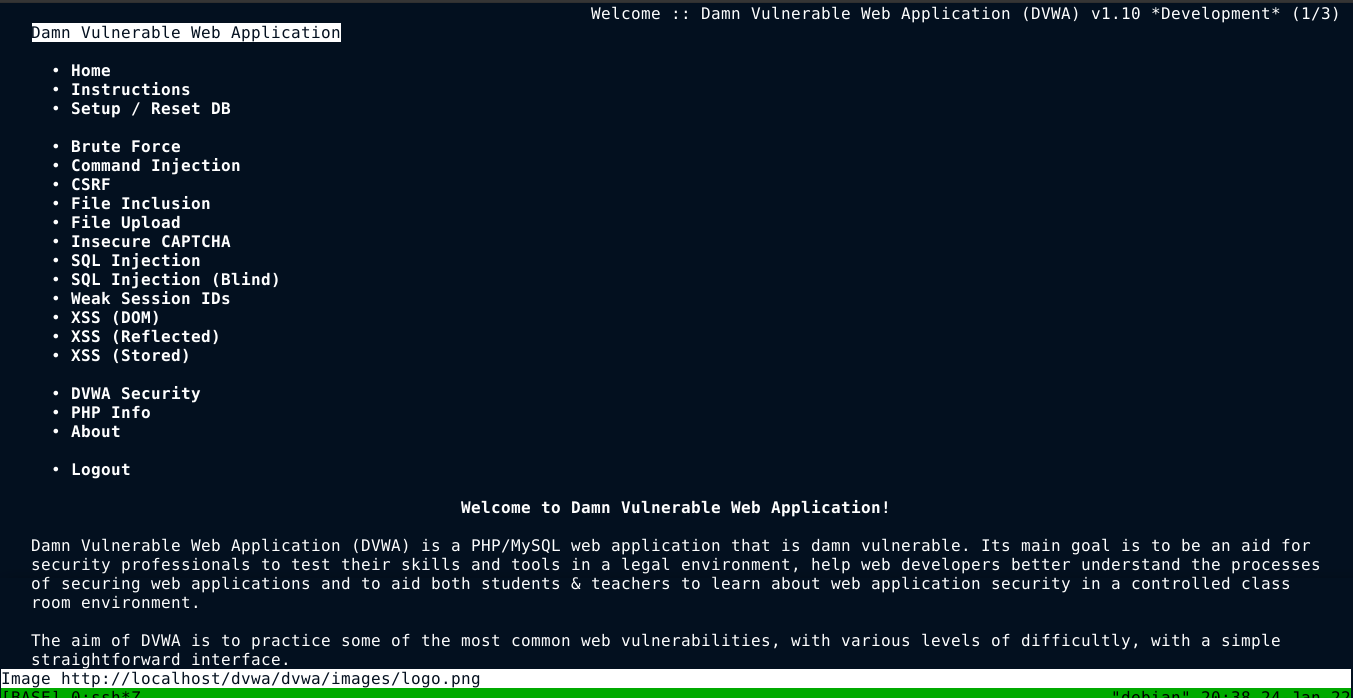
In my case, DVWA is installed at http://localhost/dvwa/. Running elinks http://localhost/dvwa load up the login page of DVWA;

Using the default credentials of admin:password, I logged in successfully. Elinks is working!

Now time to check out MITM proxy. But before we do that, we need to configure Elinks to proxy all HTTP(s) traffic through MITM proxy. A way to do that is by setting the global variables HTTP_PROXY and HTTPS_PROXY with the URL of our MITM proxy. Keeping in mind that MITM proxy by default runs on port 8080, this can be configured using the command;
1
2
$ export HTTP_PROXY=http://localhost:8080
$ export HTTPS_PROXY=http://localhost:8080
With that step completed, we can now launch the proxy;
1
$ mitmproxy
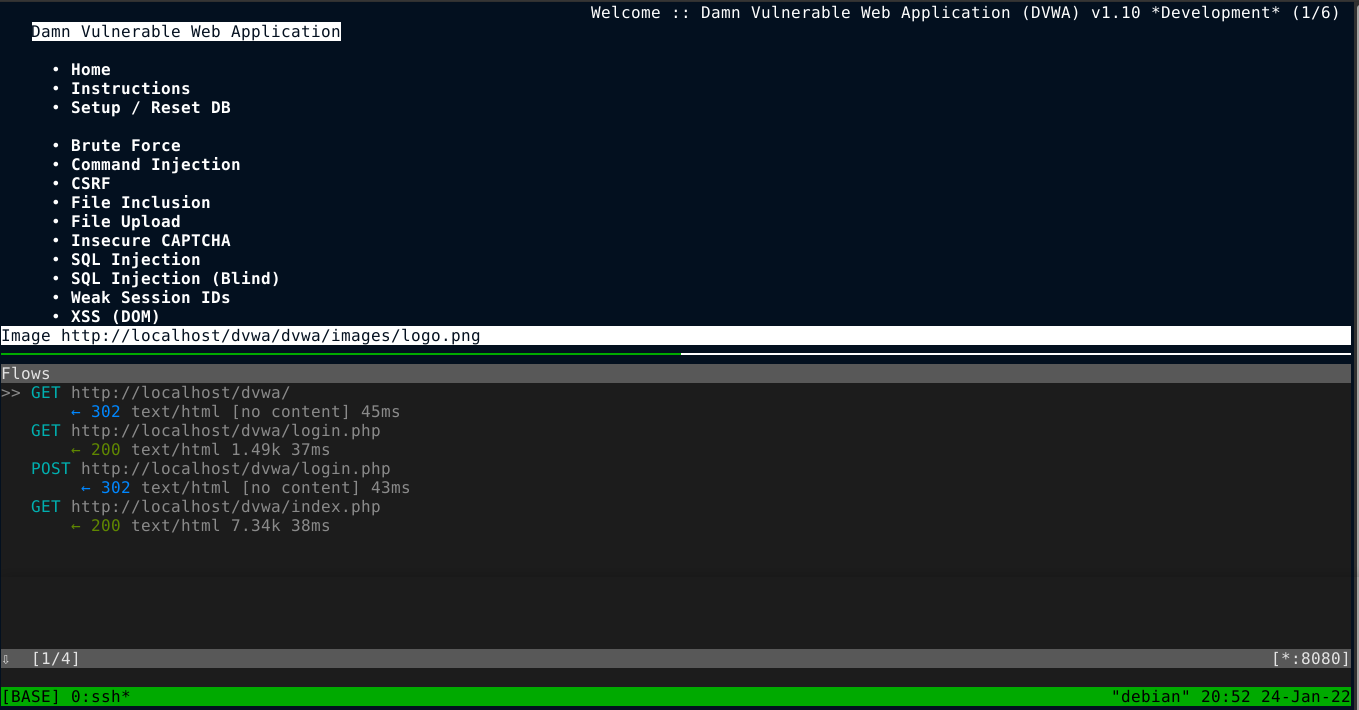
Restarting Elinks and login into DVWA, you can see that all the requests (referred to as flows in MITM proxy) were routed through the proxy;

Scrolling down the POST request used for login (using arrow keys), we could view the contents of the flow by hitting enter, or simply clicking on the flow;
(The request)

(The response. You can view this by clicking the “Response” tab, or by simply pressing the -> arrow key )

To go back to the main menu, press q, which is used to “exit the current view” (you can view all key bindings by pressing ?).
The Attack
For this post, I will be exploiting a very easy command injection vulnerability in DVWA. User is provided with an input field to enter an IP address for the web application to ping;

If you’ve used the ping utility before, the output above will look very familiar, as it is the one generated by the ping command. We can quickly test this from the console;

This indicate the the IP we entered is likely being included in a shell command. This can be tested by going to back to our proxy, and playing around with the request.

We can modify the contents of a request in the proxy by pressing e (edit), which will open a small menu asking us what we would like to edit. Since we are targeting a POST parameter, which is in the body of the request, our choice is 2;

This will open another window containing the name and values of all the form parameters. Move to the field containing localhost (the value we would like to change) and press enter to start the edit;

After you are done, press esc key (to leave edit mode in the field) and then q to go back to the flow menu. As you can see in the below image, the request has been modified successfully;

Now we need to send the modified request to the server. To do so, just hit r (replay). A small green circle marker should appear near the URL at the top of the proxy window, which indicate the flow has been replayed. Going to the response tab, we can see that the injected command was executed;

Staying Focused
Using Filters
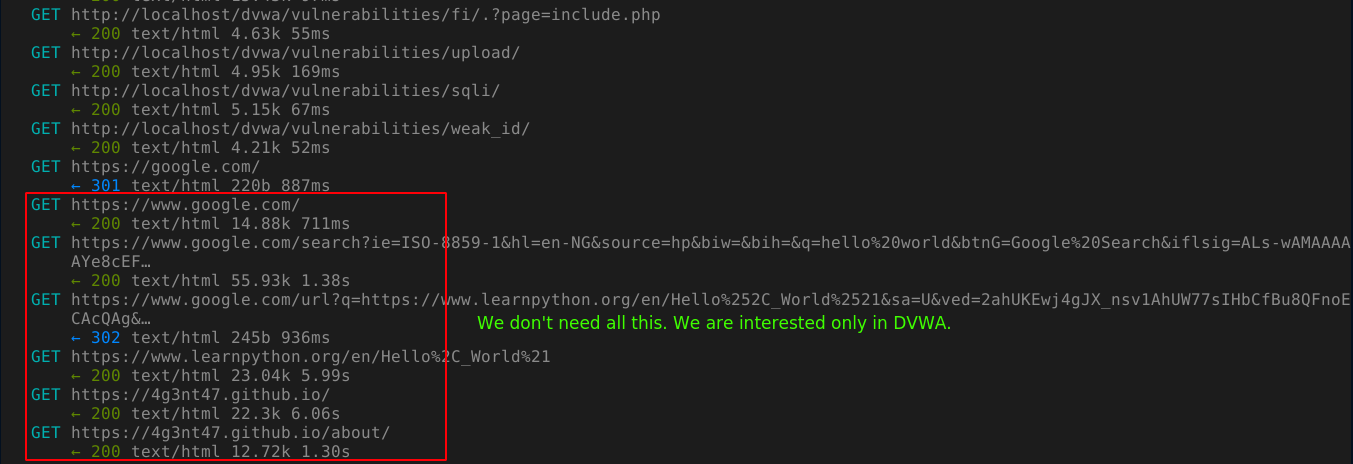
MITM proxy by default will log every request sent through it and will show it to you in the main menu. This often gets distracting as the requests pile up. A way to solve this is to set up a filter using regular expression so that only flows you are interested in are displayed. Example: In the below image, MITM proxy is showing flows we have 0 interest in;

Since we know all URLs for DVWA start with http://localhost/dvwa, we can set up a filter by pressing f, which opens the command prompt of MITM proxy and prefix it with set view filter= (we can manually open the command prompt by typing :), and typing ~u http://localhost/dvwa;

Press enter, and watch the filter come to live;

It is possible to set the filter to match more than one URL using the logical OR | operator. For example: ~u http://localhost/dvwa|https://google.com will display flows to DVWA, and Google.
Note that the ~u in front of the URL is what indicate what the pattern should be matched against. You can view other filter rules by pressing ? and clicking on the Filter Expressions tab (or pressing the -> key). You can match request body, response body, HTTP response code, request headers, and much more!
Marking flows
Another useful feature of mitmproxy that help you focus is the ability to “mark” a flow in the main menu. Just press m while hovering over a flow, and that flow will be marked (or unmaked, depending on it’s state). Notice the red dot in the image below, which indicate a marked flow;

After marking flows you are interested in, hit M to make the proxy display only flows that were marked. Press M again to disable this feature.
The Intercepts
Very often you would want to modify a request after it left a browser, but before it reaches a server. This is called an intercept, and MITM proxy can be used to do this.
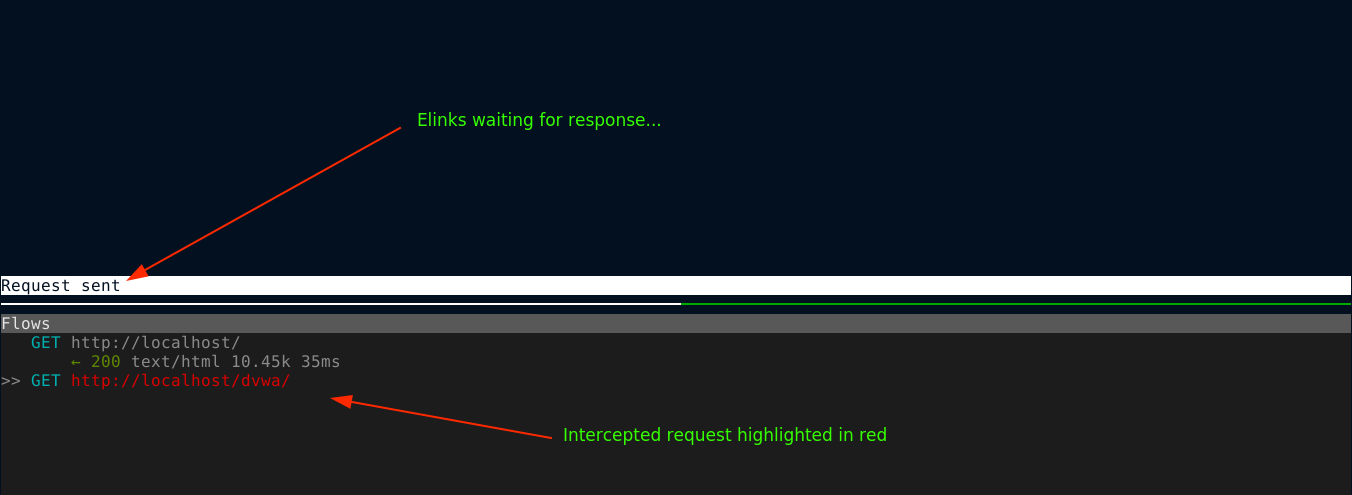
To intercept a request, you will need to define a scope, which is done using similar expressions used in filtering flows showed in the proxy menu. In the main menu, press i, which will open the command prompt and prefix it with set intercept=. In our example, we can intercept all requests made to DVWA by typing ~u http://localhost/dvwa and pressing enter.

With the intercept in place, once we visit a page that matches the given URL, the browser will hang and MITM proxy will present us with the intercepted request, which will be colored red;

Clicking on flow, we can do all the modifications we want on it. Let’s change the URL and make it point to a different path. We can do so by pressing e and selecting url in the option;

As you can see, after hitting enter, the flow has been successfully modified;

To forward this modified request to the server, press a. This will forward the request to the server and obtain a response. Note that the response is also intercepted, which gives you a chance to inspect or modify it. After you are done, hit a again to forward the response back to the browser. You can also kill an intercepted flow by pressing X in the main menu.
Sometimes, you are only interested in modifying one intercepted flow, and the number of intercepted flows may start to pile up. In this case, you can forward all intercepted flows after you are done with your modifications by pressing A in the main menu. You can also quickly enable/disable your configured intercept by pressing I, which will cause an X to appear in the beginning of your intercept rule;

Persistence
You may often need to save the work you have done in MITM proxy so that you can resume from where you stop, or just for record keeping. MITM proxy allows you to save all the listed flows from the main menu by pressing w, and typing the name of the file you want to save the flows as;

The above will save the flows as dvwa.flows. Alternatively, you can save an individual flow by opening the flow (by clicking on it) and pressing w, which will prompt you for a filename.
To load the saved flows next time you launch the proxy, press L in the main menu, and enter the name of the file containing the flows;

Bonus
Responsible Modifications
When modifying a flow in MITM proxy, you should always start by making a copy of it. That way, you have an unmodified copy you can go back to if you messed up the copy you are working on, or just for reference purposes. You can duplicate a flow in the main menu by pressing D while hovering over the flow;

To delete a flow you no longer need, just press d while hovering on it. You can also wipe out all flows by pressing z.
MITM Web
MITM proxy comes with another program, mitmweb, which you can use to start a proxy that you can control through a web browser. To use this, do;
1
$ mitmweb
The above will start a proxy server on port 8080, and the web interface of the proxy on port 8081. Going to http://localhost:80801, you will be presented with the web UI of MITM proxy;

Conclusion
MITM proxy is a very nice tool that you can use to easily study and modify web traffic. It has a bit of a learning curve like most tools, but once you get the hang of it, it is quite amazing. The key bindings make most of the tasks a lot less painful. I find myself using it quite often when all I need is a few basic web proxy functionalities.